
By Taylor Herfurth
How many video calls are you in these days? In the last five years, the number of video calls we’re all making has increased dramatically. Isn’t it getting tiring? Monotonous? Well, consider swapping out your physical camera for a virtual camera.
A virtual camera replaces your camera in a video call (it’s not just screensharing) with anything you want: a whiteboard to explain your ideas, a responsive avatar to represent yourself when you don’t want to tame your bedhead, or a nametag and subtitle to bring people up to speed.
This software opens so many opportunities to up your video call game, but setting it up can be a bit tricky. This guide will tell you everything you need to know to get started with a virtual camera.
Setting up the Virtual Camera
Open Broadcast Software, also known as OBS, is a popular, free and open-source software used to record your own screen, stream to websites like YouTube and Twitch and, importantly for you, create a virtual camera.
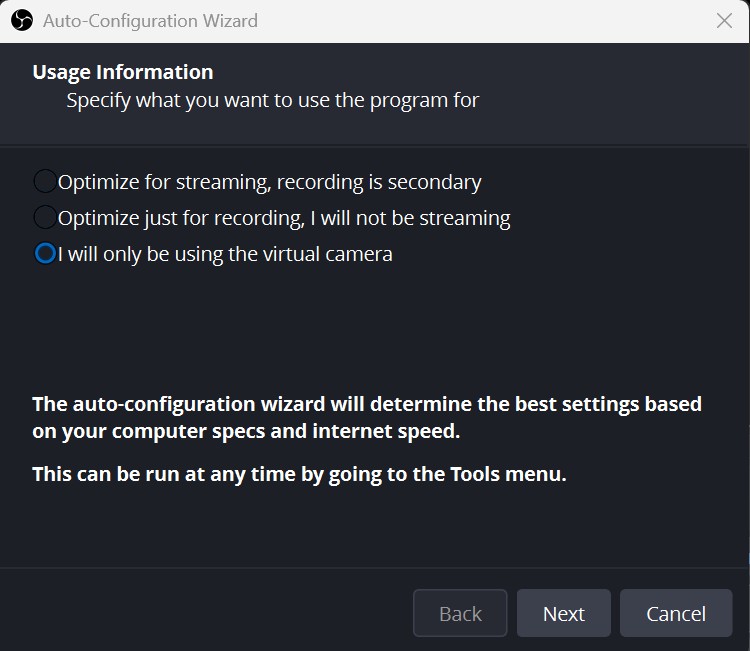
OBS can be downloaded from its official website. Once installed, select “I will only be using the virtual camera” and OBS will automatically adjust its settings to the best fit for your computer and internet speeds.
Now that OBS is set up, let’s check out some features.
Sources
Sources are like different layers, you can add as many as you like and they’ll all appear on your virtual camera.
Here are some useful ones:
Video Capture Device adds your webcam to the virtual camera. When adding, there will be a lot of settings, but the only important one is selecting the right video source.
Audio Input Capture adds your microphone, so people can hear you. Don’t worry if you don’t have a separate microphone, most laptops have a built-in microphone.
Image adds an image. You can add any image you have downloaded to your computer.
Text (GDI+) adds a textbox. You can change the font, size, colour, rotation, and opacity to write anything you want.
Window Capture is a screen share. It will only share the window you select, rather than what you’re looking at, so you won’t need to worry about accidentally displaying something private. If you do want to share everything you look at, Display Capture is the source you’re looking for.
You can shrink your sources or drag them around the virtual camera to organise them however you want.
Tip: If you want to have multiple set-ups of sources, create a second scene. In your second scene you can set up different sources and still switch back to your first scene whenever you want. No need to save your sources.
Want to test it out? Hit ‘Start Virtual Camera’ in the bottom right, and then turn on your camera in any program like Zoom, Teams or Discord. What you’ve added in OBS will show up on your call.
Now that you’ve tried some sources, let’s explore the different ways to use them.
Overlay
The simplest use of the virtual camera is an overlay. You can create a textbox from inside OBS by clicking the plus at the bottom of Sources and selecting Text (GDCI+). If you want to create a nicer looking overlay, try using Canva to find a template or make your own. A well designed overlay can really bring a sense of style and quality to your next e-meeting.
Watch out: If your text is part of the overlay image, you won’t be able to change what it says mid call. If you might want to do that, create your graphic blank and overlay a textbox in OBS.
Be Onscreen with your Slides
A limitation of most video call platforms is the awkward layout of cameras, especially if you enter presenting mode. Do you want your audience to clearly see your slides and you? To do this:
- Use Window Capture to capture your slides (or whatever you want to share) and make them fill the virtual camera window.
- Then use Video Capture Device to capture your video feed and shrink it to fit in the corner of the virtual camera.
- Is there empty space on the sides of your camera? Hold alt while dragging the side of your camera feed that you want to crop. This prevents unused space from covering your Window Capture.
The extra mile: A border around your camera feed can make it look even better! To do this, create or find a transparent frame image and add it using Image source. Move it and resize it to fit around your camera.
The extra extra mile: If you have a green screen behind you, you can make your background invisible and appear right over your presentation. Once you set up the green screen physically, go to OBS and select the Filters button above Sources. Under Effect Filters, add a Chroma Key. It will be set to green by default, and should already be working. If you’re using a screen of a different colour, you can pick a custom colour to key out. Close Filters.
Fun Fact: ‘Chroma keying’ or keying for short, is a computer visual effect that allows you to remove all of a colour from your video. The reason green is used is because there is very little green in human skin tones.
Whiteboard
Inside OBS you can move, resize, and rotate all your sources, not only to prepare your scene, but also while speaking to illustrate your points.
Tip: You can add an image of an arrow and drag it around the screen to point at things.
If you miss having a physical whiteboard to write on, you can use Window Capture to capture a whiteboard software. Onlineboard and Web whiteboard are free, browser-based, no-login options. Zoom and Microsoft both have their own whiteboard softwares, but they require an account to use.
Avatar
If you’d rather not show yourself on camera, but still want someone for the people you’re on call with to look at, a reactive avatar could be right for you.
While many avatar programs exist, veadotube mini is the simplest and easiest to get started with. This free program is available at veado.tube. When you open the program for the first time, you’ll be greeted by a bouncing deer in a tube. Notice that the deer opens its mouth when you make noise? If not, check your audio device is connected in veadotube mini and adjust your noise sensitivity.
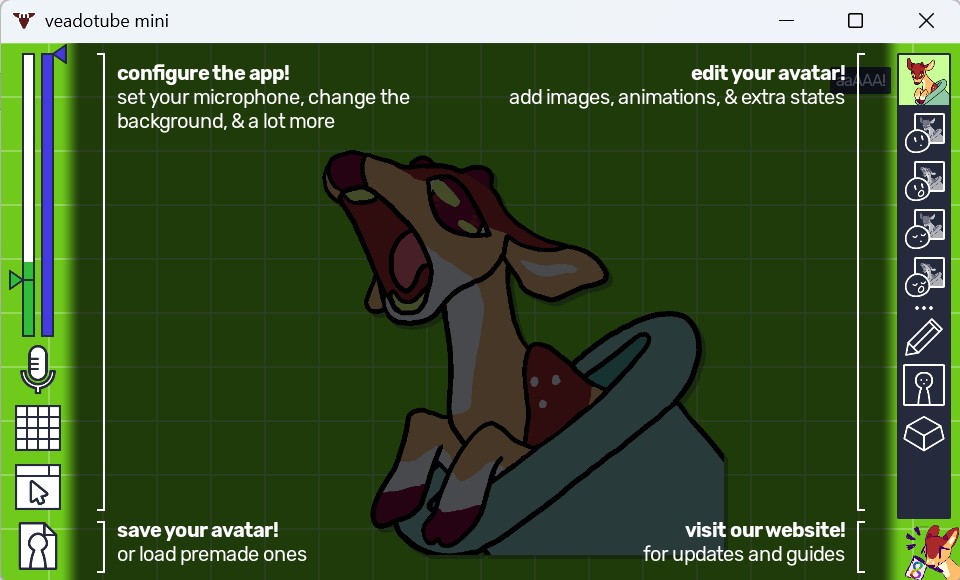
This deer, named Tube by the creators of veadotube, Bella and Luna Olmewe, is the default avatar of veadotube mini. It is a fully functional avatar which you can use as much as you’d like.
A veadotube mini avatar is made up of four images, as shown in the upper right of the program. Mouth closed eyes open, mouth open eyes open, mouth closed eyes closed, mouth open eyes closed. It functions by blinking on a timer and opening its mouth any time your microphone picks up sound.
Tip: Using the button in the top right, you can add new ‘states’ to the avatar, these can be wholly different avatars but are usually used to have the same avatar making a different expression.
When your mouse is not over the program, everything other than the avatar will turn a solid green. This enables the avatar to be easily greenscreened in the same way a person on camera would be. For a reminder on how to set up a greenscreen in OBS, scroll back up to The extra extra mile.
If Tube isn’t your style, they can easily be replaced by hitting avatar settings in the bottom left corner. More avatars can be found on the veadotube site, or available for free around the web. Your avatar can be anything, from an original drawing to a photo of you; creativity is the limit.
If you’re looking for a customized model but aren’t confident in your drawing skills. Picrew is a great resource for creating your four avatar images. It’s a free tool that allows you to create customized PNGS of an avatar and multiple expressions. Simple BW, VectorJam and Maddel Picrew are good Picrews to consider.
Whether you’re teaching, managing, or simply catching up with friends, video calls have become a regular part of life. Now that you understand the virtual camera and how to use it, you can bring something new to what has become monotonous for so many.
Leave a Reply