
By Terrance Lee
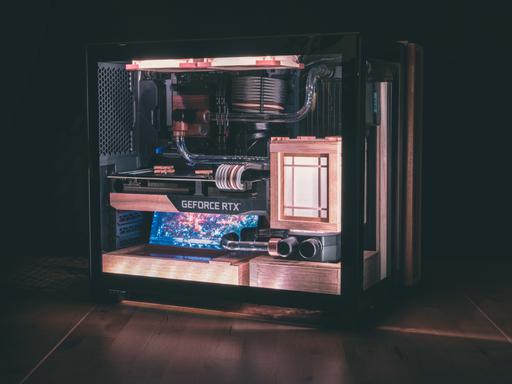
Building your own desktop gaming PC can be a daunting task, and with part prices getting increasingly more expensive, the pressure to get it right on the first try, is higher than ever. To help you get what you want, here are a few simple steps on how to get started.
Step 1 – Set your price limit
Building a PC can be expensive endeavor so decide how much you are willing to spend; An average build can run you anywhere between $3,000 to $4,000, while higher end PCs can cost upwards of $5,000 or more. There are also the added cost of peripherals beyond the PC itself, those being the monitor, a keyboard, and a mouse, as well as extra items such as a microphone, speakers, a camera, and headphones, all of these should be accounted for when budgeting for the build as they can cost an additional $500 to $1000 depending on quality and branding.
Step 2 – Pick its purpose
Figure out what you are planning to use your PC for.
For example, if you plan to use your PC for some of the newest games, you should check the recommended requirements for the latest releases rather then older titles.
Consult the games recommended requirements are usually listed if you search online for the game in question. Using 2025’s game of the year Clair Obscur: Expedition 33 as an example, the game recommends the following parts.
OS: Windows 11
Processor/CPU: Intel Core i7-12700K / AMD Ryzen 7 5800X
Memory: 16 GB RAM
Graphics/Video Card: NVIDIA GeForce RTX 3060 Ti 8 GB / AMD Radeon RX 6800 XT 16 GB
Storage: 55 GB available space
Additional Notes: SSD required
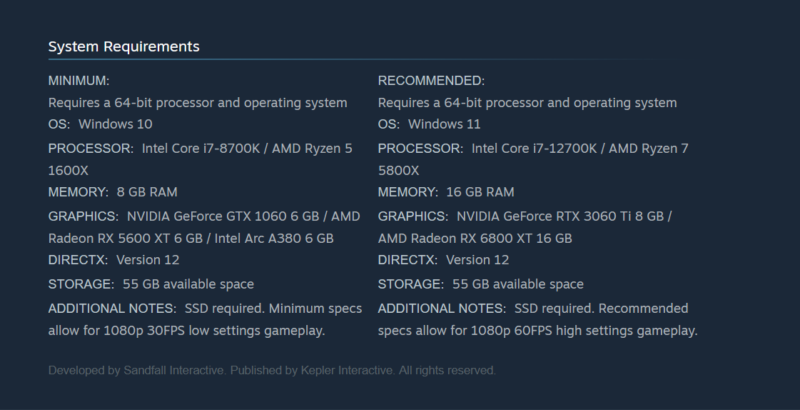
When selecting parts, you should aim to meet or beat the recommended benchmarks listed.
Once you have an idea of what benchmarks you want to hit, it’s time to look for parts which meet those requirements.
You may also need to purchase other items to accompany your computer, namely operating software, a monitor, a keyboard, and a mouse.
There are many third-party websites that can help you with this process. One useful website is PC Part picker as it also allows you to check part compatibility.
Step 3 – Construct the core
Start by selecting either a motherboard or a CPU. This will determine the rest of the parts your PC can use.
Motherboard and CPU must be selected in tandem as one will have to fit the other. These act as a base from which the rest of the PC will be built around.
Next you’ll need to add a cooling system; Processors generate a lot of heat when they run. Unfortunately the hotter they get the slower they operate. Processors require things like heat sinks and cooling fans to divert those excess degrees. Before picking one check to see what your CPU’s Thermal Design Power (TDP) . TDP is essentially the maximum temperature your CPU can withstand. Afterwards select a cooling system that is both rated for it and fits on top of your CPU.
Step 4 – Don’t forget memory
Now that that’s done, select some memory sticks, or RAM which fit into your motherboard. If you plan to use more than one memory stick, try to make sure you get matching ones of equal size as mixing multiple grades of RAM can cause problems down the line. If you are trying to reach a benchmark for a game, here is where you should aim to go higher than the recommended amount.
After that select a video card these tend to be rather expensive so be prepared to allocate a fair chunk of your budget to this.
Step 5 – Thinking about storage
Once that’s done, it’s time to pick out the storage, for this there are essentially two types of storage units, solid state drives (SSD’s) and hard disk drives (HDD’s). SSDs are usually the better pick as they are faster and more compact than HDDs, but HDDs can be cheaper and store more data when it comes to storage per dollar, so depending on your budget and requirements make the choice that works for you.
Now that you’ve selected all the parts which use power it’s time to select a power supply this can be hard to do on your own so try using a third-party website to calculate the power consumption of all the parts you have picked up to now and then select a power supply capable of supplying that amount power at minimum to your PC.
Finally, now that you have all the parts it’s time to pick a case to house them, first and foremost when selecting a chassis pick one capable of housing all of your PC’s parts, aesthetics can come afterward.
Step 6 – Build it
Now that you have all the pieces, it’s time to put them together. Start by clearing out a clean dust workspace to lay out all your parts. Beware; Some of them are small and may roll around. Now exact order of assembly can vary based on what parts you selected and the chassis you are fitting them all into, but generally you will start by first installing your CPU, memory sticks, and storage into the motherboard before installing the motherboard into the chassis and attaching the power supply to the motherboard. Next, attach the cooling system to the CPU and secure the video card to the chassis. Lastly, make sure the power supply is plugged into everything that needs it and close the chassis.
Step 7 – Finalize it
You should now have a functional PC. Attach your peripherals and try turning it on. Assuming you did everything right, you should now from here be able to install an operating software. Most games require Windows 11, which will require a the purchase of a key and accompanying flash drive in order to download
However, provided you are willing to put in a large amount of extra effort, there is a range of open-source other operating systems out there like Linux distributions like Fedora and Ubuntu or others like Free BSD. These can be fun for techies to play with, but the range of software options is limited and there may be compatibility issues with peripherals. Proceed with caution.
Leave a Reply